Crafting Dynamic Levels in Houdini for Unity
How I built a level generator in Houdini for my Unity game that used vector images to construct levels.
Level design can be one of the trickiest parts of game development. You're constantly juggling geometry to find that sweet spot between challenge and fun. You need to introduce new game mechanics at the right pace and give players a breather between tough puzzles and intense combat. And, of course, you want your levels to look fantastic. But most importantly, you've got to put those levels through rigorous playtesting to ensure that players aren't left scratching their heads or feeling overwhelmed.
For all these reasons, I knew I couldn't just rely on the usual method of creating levels in Blender and then importing them into Unity. While I had some experience with Houdini for physics simulations, using it for procedural modeling was an uncharted territory for me. So, when it came to my current project, "Flugi" - a 2.5D puzzle platformer where you're in control of a fly, I decided to take the plunge and explore something new for level creation.
Houdini is a 3D software that's quite the darling in the VFX and gaming industries. Its standout feature is the fact that everything you do inside it, whether it's tweaking faces or moving vertices, gets wrapped up into a neat little node. This essentially means that every action you take becomes procedural. You can fine-tune those changes even after the fact, and the rest of your node tree just adapts accordingly.
My journey started with me "drawing" out some flat topography on a plane. It felt like sketching a 3D version of the level in real-time, and it looked something like this:
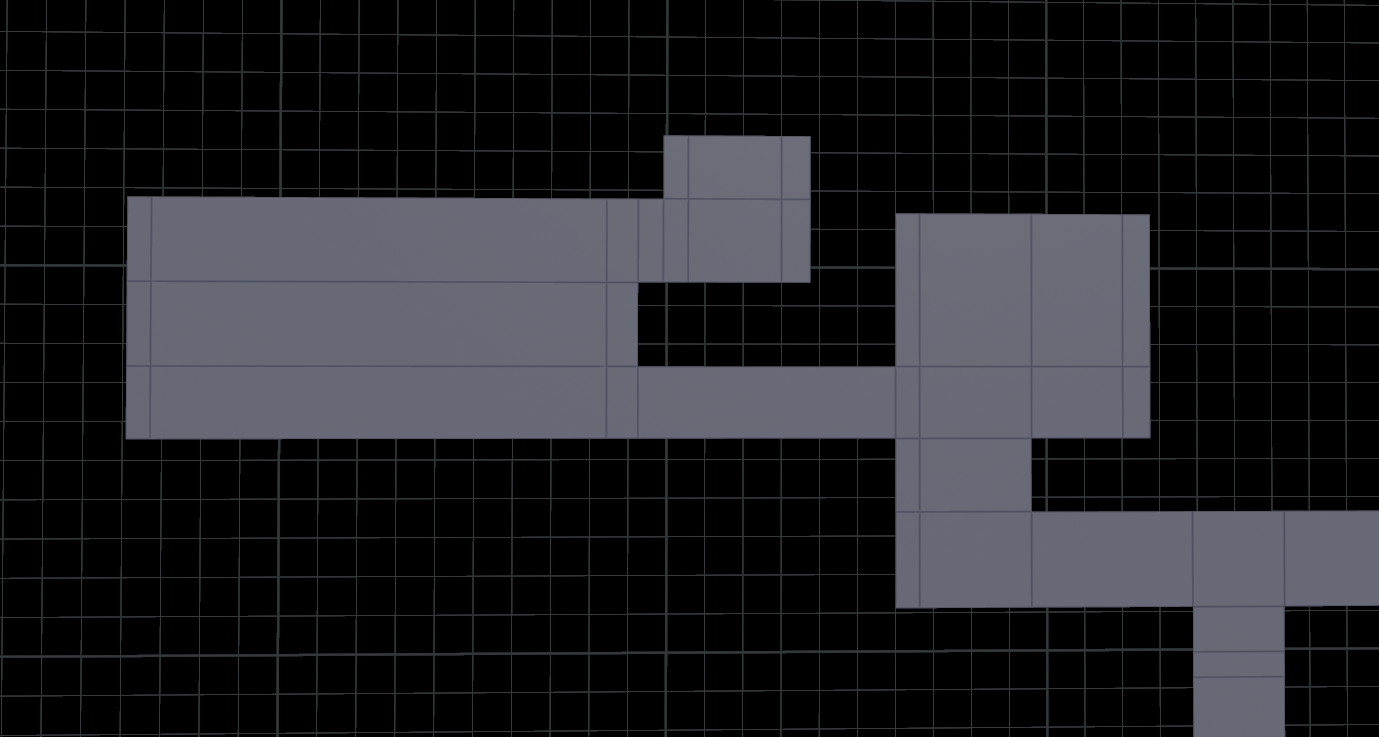 The stage is looking too square
The snag with this approach was that my levels ended up feeling a bit too blocky and square-ish. Essentially, I was just extruding some edges. So, I asked myself, "What if I could 'draw' the level more like I do on a piece of paper and have it automatically transform into a 3D level?"
After some digging around, I stumbled upon this fantastic Houdini library based on Python called ae_SVG. It allowed me to import SVG files into Houdini, think of it as turning a 2D vector design into a complex 3D structure. I decided to give it a go, drafting my levels in Adobe Illustrator.
What's cool about working with vector-based drafts instead of bitmap images is that vectors can carry heaps of information about shapes and colors, and you can have multiple shapes overlapping each other without a creating limitations.
In Illustrator, I aimed to keep things as simple as possible to facilitate easy changes if I wasn't satisfied with the level design. For instance, I primarily used strokes instead of expanded shapes. This allowed me to swiftly adjust the stroke width, effectively altering the width of the "tunnel" I was creating in the game. Additionally, I employed black shapes to define areas of the level that needed to be "cut out." Instead of manually using the Pathfinder functionality to remove them, I left this task for automated processing, offering flexibility in resizing certain walls as needed.
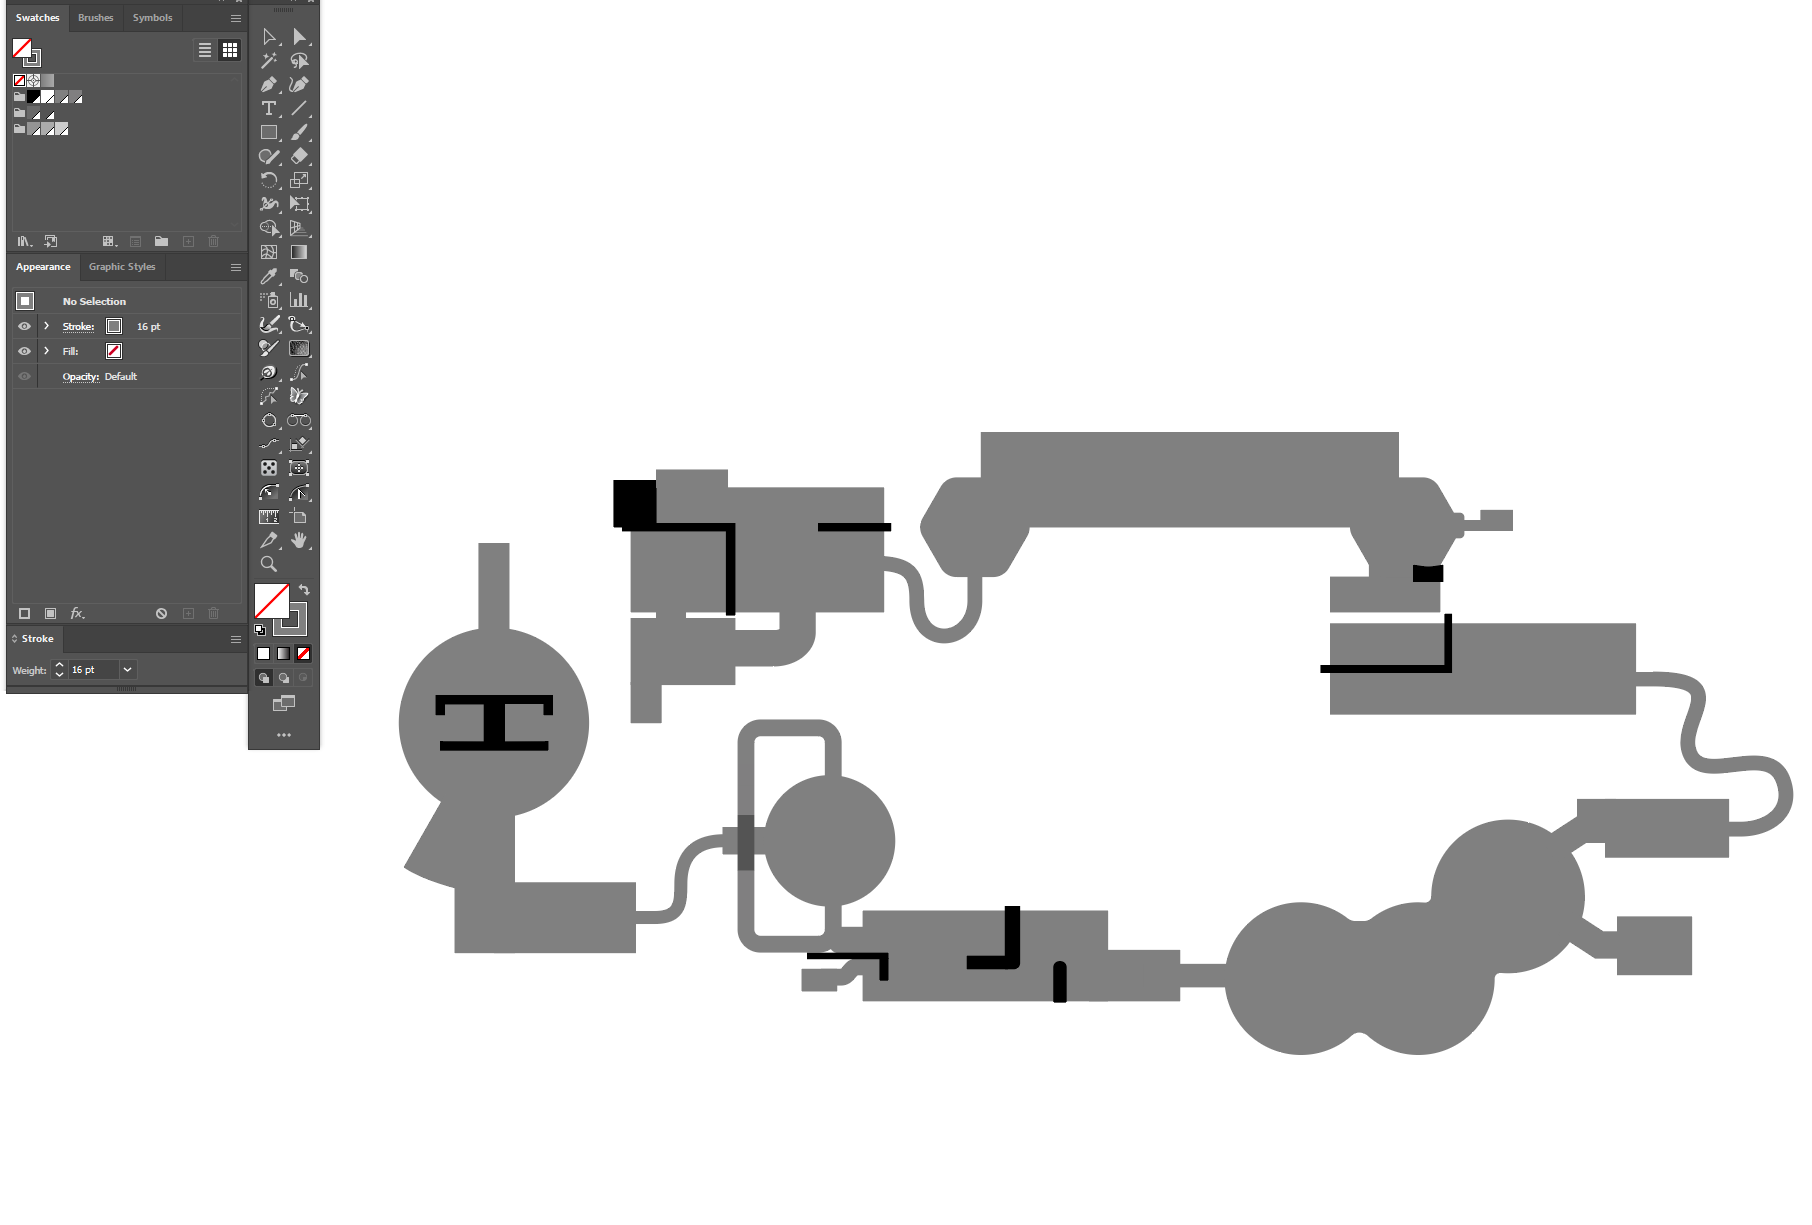 How a map layout looks in Illustrator before beign exported to Houdini
Once I had my level layout figured out, I had to get the SVG export just right so that Houdini would accept it seamlessly. I devised an Illustrator action to automate the process. This action performed various tasks, such as expanding all the shapes, consolidating those with the same color, eliminating the black shapes from the map, and tidying up any extraneous points that were unnecessary for representing the stage's shape.
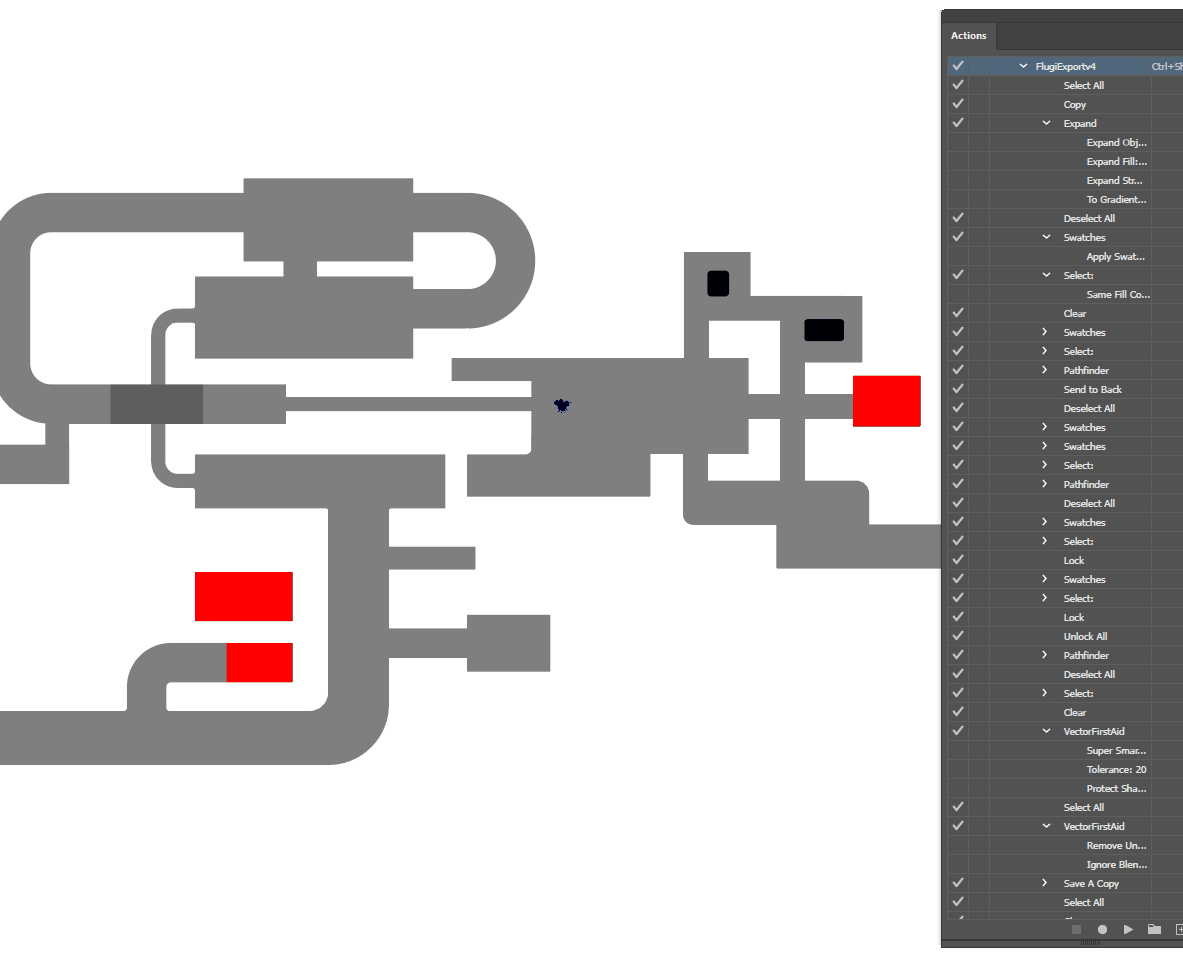 The Illustrator action in action, get it?
In the images, you can also see some color coding in Illustrator. These colors signified different properties of the level in Houdini. For instance, red areas told the game not to spawn grass on the floor, helping players understand puzzles better. Various shades of gray represented different depths in a stage, allowing for "tunnels" to pass above or below other parts of the level. I used an attribute wrangle for this:
 Snippet of VEX code that moves faces depending on their assigned color
With all these pieces in place, it was a matter of meticulously adding nodes. These nodes would generate geometry in a logical way, no matter the level template I started with. Procedural modeling in Houdini revolves around intelligently creating groups of vertices, edges, and faces. This allows you to perform modeling operations on them at a later stage. Unlike Blender, where you can select faces directly in the viewport, in Houdini, it's a bit different. While you can select faces manually, doing so would compromise the procedural nature of the process and hinder its compatibility with different map layouts – which is precisely the objective in this case. Since we began with a basic map layout, we can easily create and manage groups as we progress with our modeling operations.
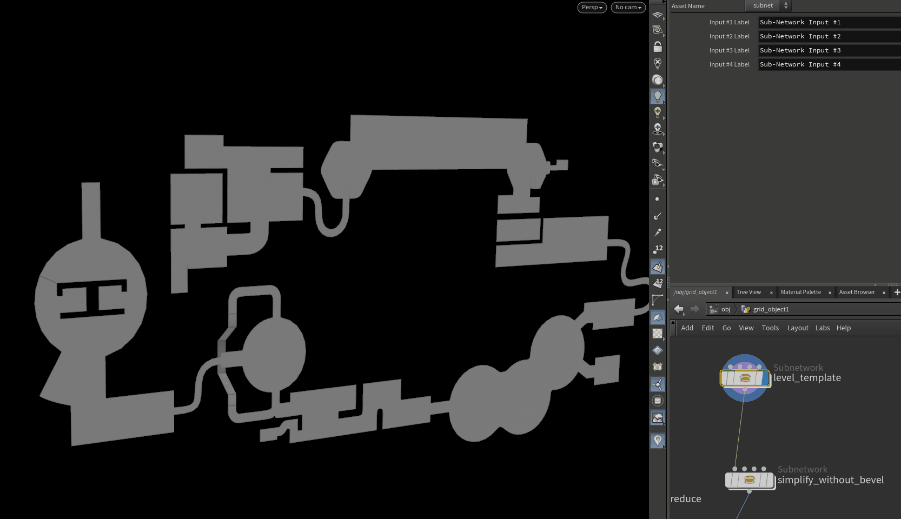 I separated different logic parts of the process into various subgroups. You can see them in action here
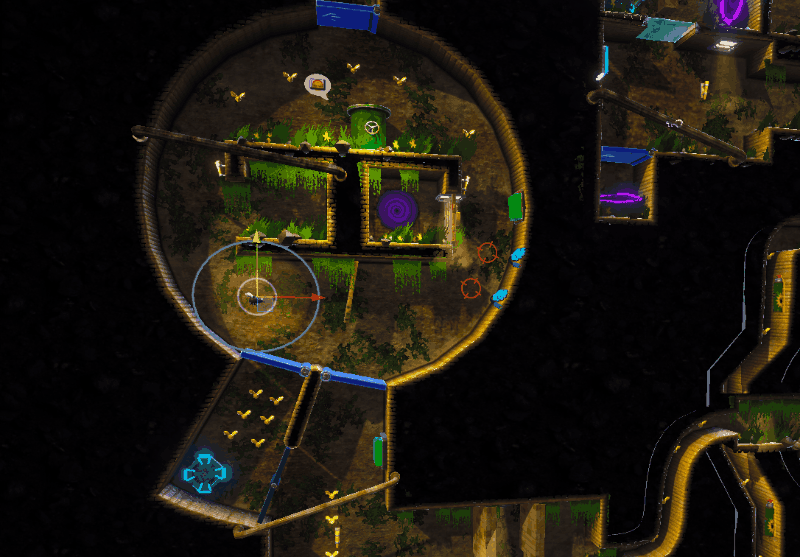 Here is how that same level looked in Unity once the materials where applied
As for materials, I decided to use triplanar shaders for the background and walls instead of the traditional UV mapping. It gave me more creative freedom when it came to shaders in Unity. Plus, I didn't have to stress about texel density or UV island rotations for different-sized levels. In Houdini, I assigned different vertex colors to parts of the geometry and used these colors to control various aspects of the triplanar shader, adding some much-needed variety.
For the task of creating the shaders for the scenery, I used Amplify Shader Editor, a highly potent visual shader editor that enabled me to craft rather intricate shaders without the need to manually write HLSL code.
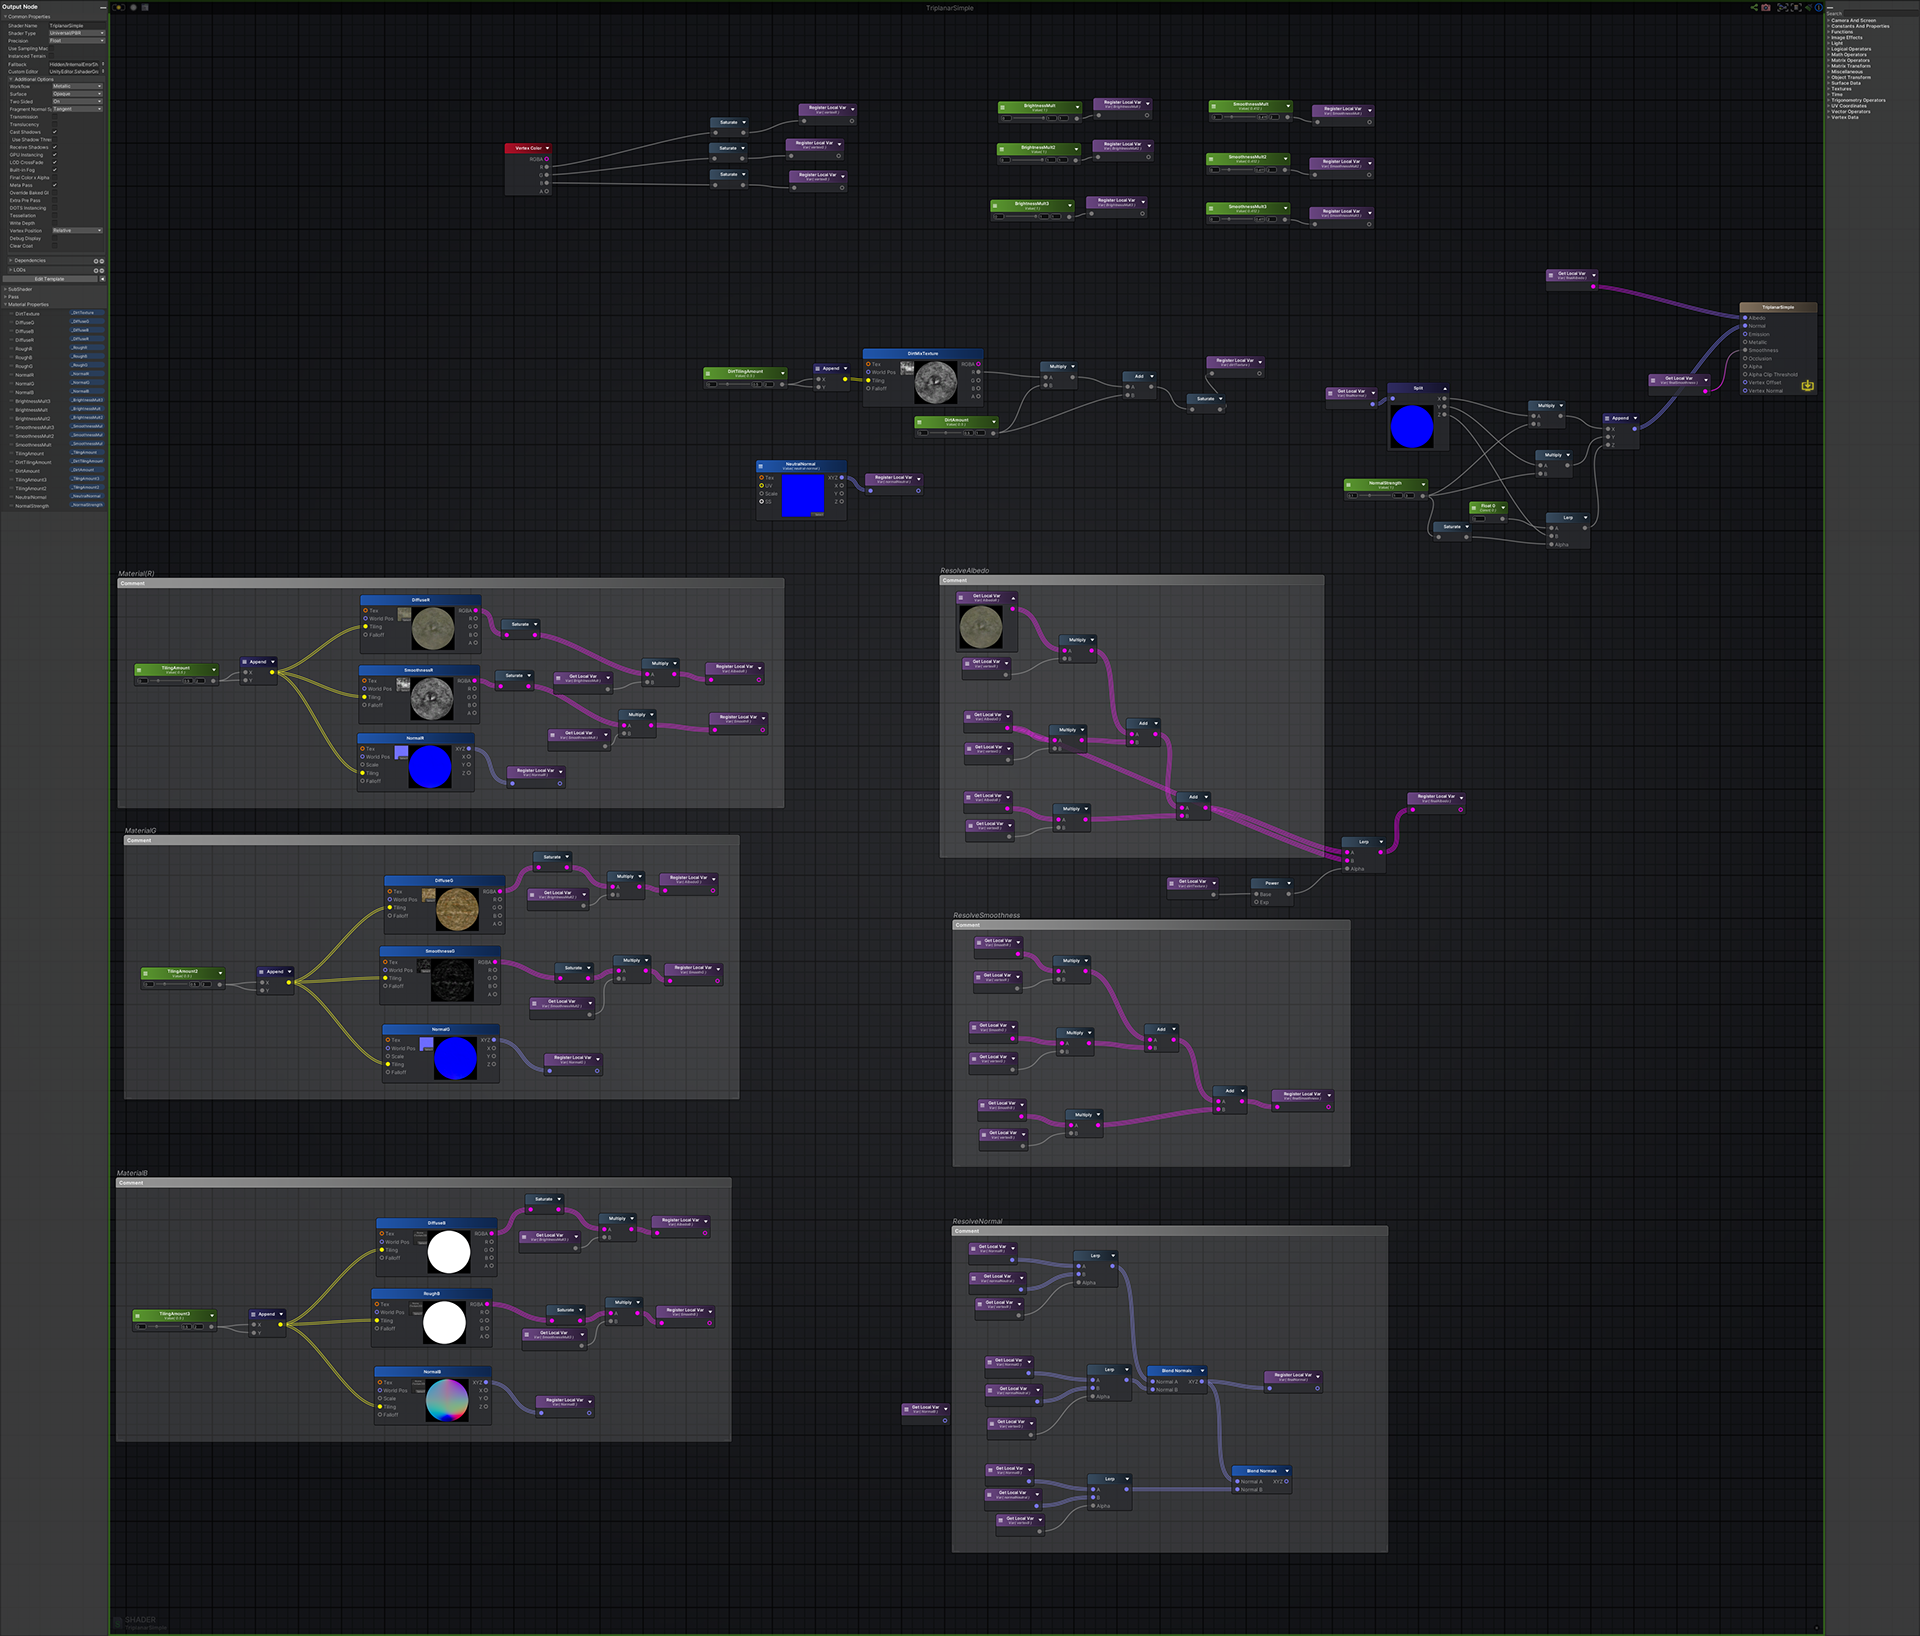
I also exposed many variables so I could easily tweak the look of the level inside the Unity inspector:

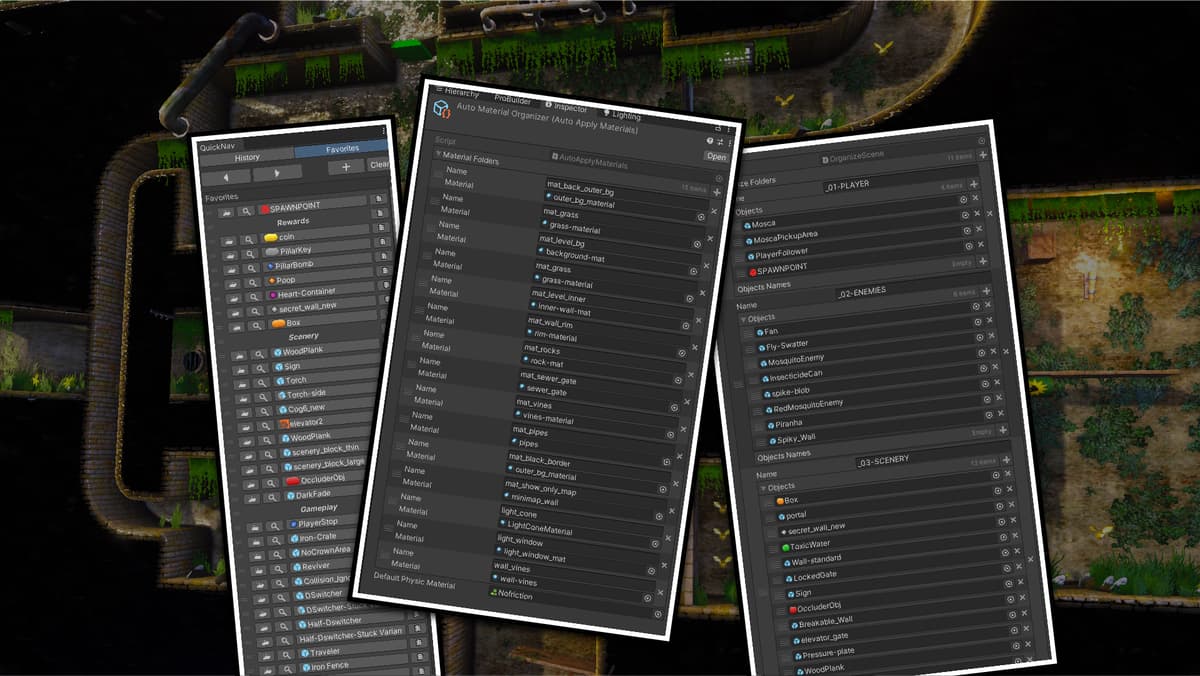
Assigning all the different materials to the level components (background, grass, vines, walls, etc.) was a bit of a chore. So, I created a custom editor script and mapped it to a shortcut. This made assigning materials a breeze:

In the end, I was pretty happy with how everything turned out. It was fast enough that making small changes to the level didn't felt like a chore, and the end results looked handcrafted enough, perfect for a solo project of this scale. Plus, the system is pretty adaptable, making it easy to introduce different types of environments in the future.
I hope you enjoyed this blog post and found it informative. If you've got any questions or thoughts, feel free to drop them in the comments below. In my next post, I'll dive into how I revamped various game systems to allow for more open-ended design, which made implementing features like co-op a whole lot easier. Plus, I'll showcase some of the scripts I cooked up to keep my scenes organized and how they ended up being lifesavers in the development process. Stay tuned for more!